How to Clean and Polish Copper Cookware: From Patina to Shine
Proper care and maintenance of your copper cookware ensures it remains beautiful and functional for generations. Whether you prefer the classic shine of new copper or the distinguished patina of aged pieces, understanding the right cleaning methods is essential.
Natural Methods
DIY cleaning with household items
Professional Products
Commercial copper cleaners
Damage Repair
Fix scratches and worn linings
Natural Cleaning Methods: DIY Copper Care
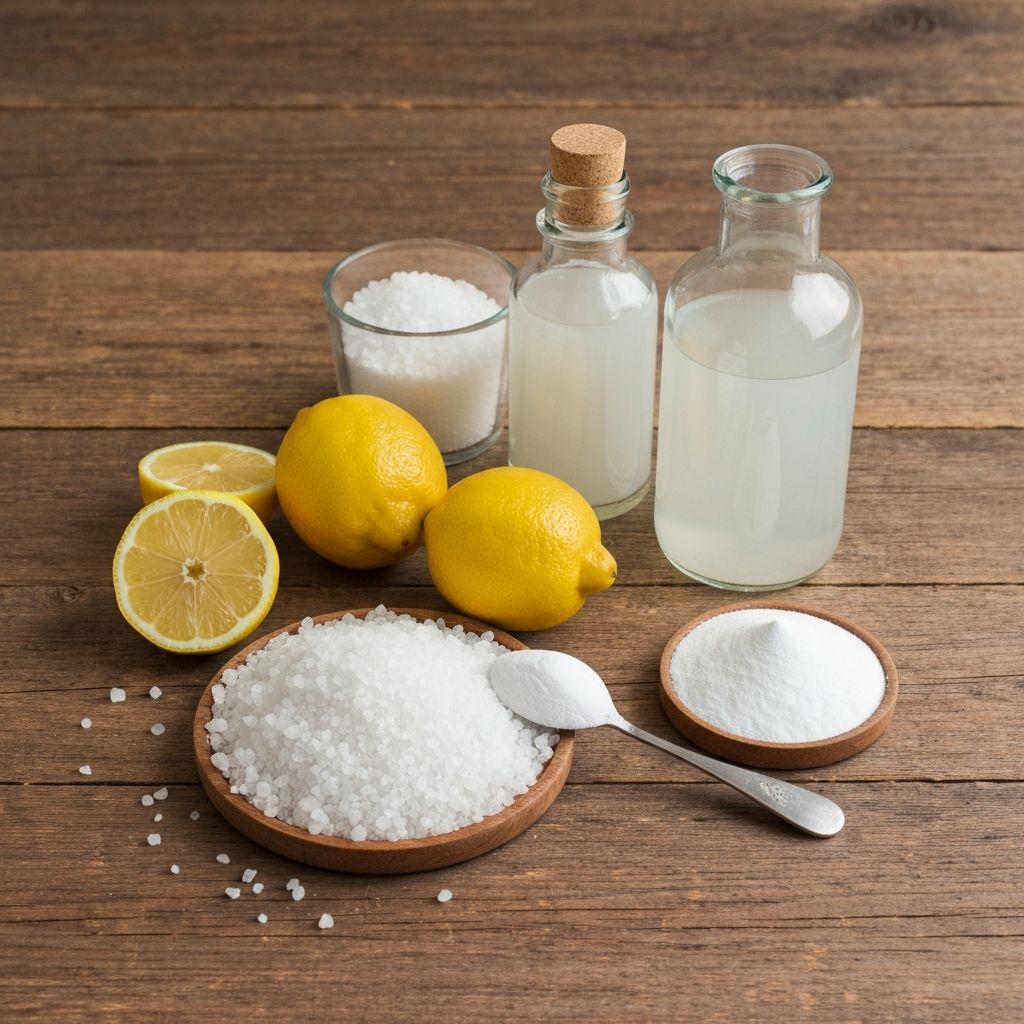
These time-tested natural methods use common household ingredients to clean and polish your copper cookware. They're safe, effective, and completely food-safe—perfect for maintaining the interior of tin-lined copper pans.
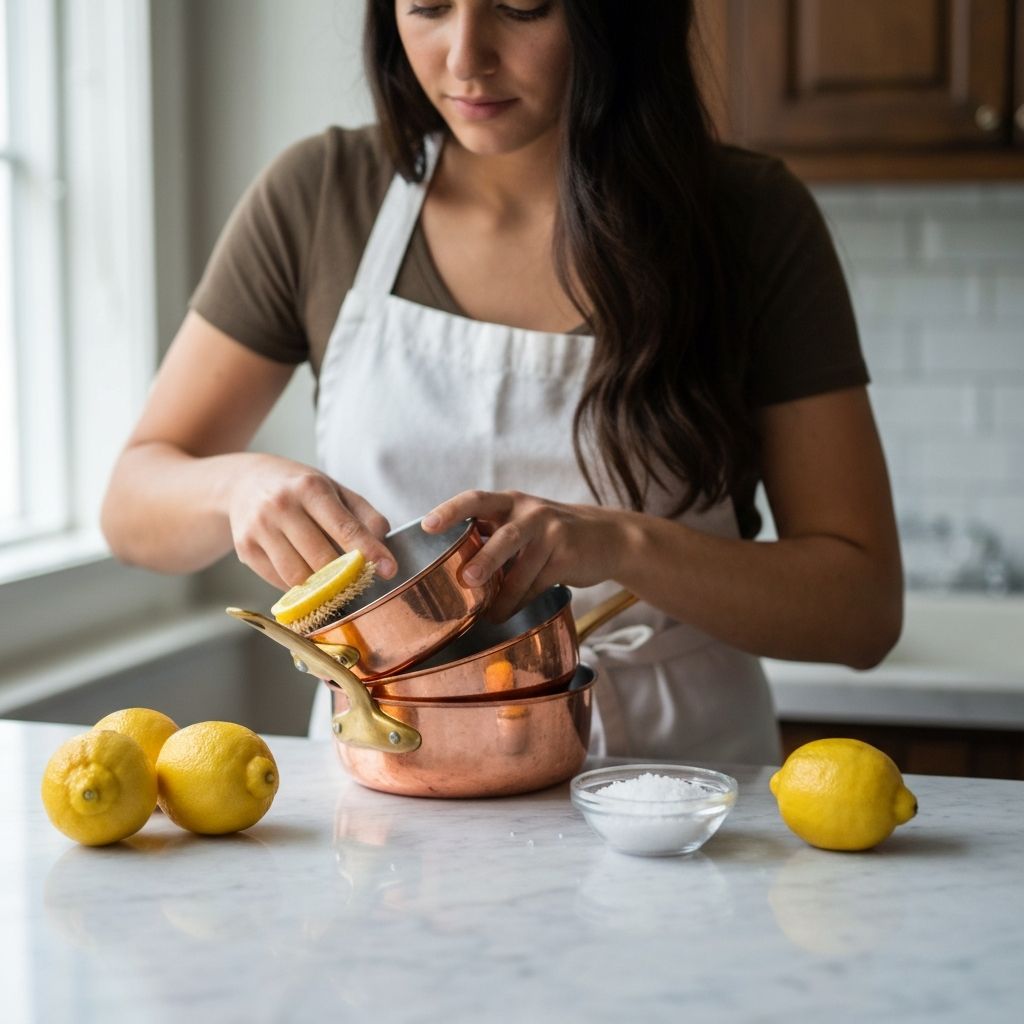
Lemon & Salt Method
The most popular DIY copper cleaning trick
Step-by-Step Instructions:
- 1.Cut a fresh lemon in half
- 2.Dip the cut side in coarse salt (kosher or sea salt works best)
- 3.Rub the lemon directly onto the copper surface in circular motions
- 4.The citric acid in lemon combined with salt's abrasive action removes tarnish effectively
- 5.Rinse thoroughly with warm water and dry immediately with a soft cloth
Why It Works:
This natural method is perfect for light to medium tarnish. The acid in lemon juice breaks down copper oxide while salt provides gentle abrasion without scratching. It's completely food-safe and leaves a fresh scent.
Ketchup Method
Surprisingly effective and readily available
Step-by-Step Instructions:
- 1.Apply a thin layer of regular ketchup to the tarnished copper
- 2.Let it sit for 5-10 minutes (or up to 30 minutes for heavy tarnish)
- 3.The acetic acid in tomatoes and vinegar works to dissolve copper oxide
- 4.Rub gently with a soft cloth or sponge in circular motions
- 5.Rinse thoroughly with warm water and dry completely
Why It Works:
Ketchup contains both acetic acid from vinegar and citric acid from tomatoes, making it a powerful yet gentle tarnish remover. The thick consistency allows it to cling to vertical surfaces and work its magic without dripping.
Vinegar & Salt Paste
Heavy-duty natural cleaning solution
Step-by-Step Instructions:
- 1.Mix equal parts white vinegar and table salt to create a paste
- 2.Add a tablespoon of flour to thicken if needed
- 3.Apply the paste generously to tarnished areas
- 4.Let sit for 15-30 minutes for heavy oxidation
- 5.Scrub gently with a soft sponge, then rinse and dry thoroughly
Why It Works:
This powerful combination is ideal for heavily tarnished copper. The acetic acid in vinegar dissolves tarnish while salt provides abrasion. Flour acts as a mild abrasive and helps the paste adhere to surfaces.
Baking Soda Polish
Gentle buffing for a brilliant shine
Step-by-Step Instructions:
- 1.Create a paste with 3 parts baking soda to 1 part water
- 2.Apply to clean copper using a soft cloth
- 3.Buff in gentle circular motions
- 4.This is a finishing step after tarnish removal
- 5.Rinse and dry for a mirror-like finish
Why It Works:
Baking soda is a mild alkaline abrasive that polishes without scratching. It's perfect as a final step after removing tarnish to achieve that brilliant new-penny shine. It also neutralizes any remaining acids from previous cleaning.
Important Natural Cleaning Tips
Always Do:
- ✓Test on a small hidden area first
- ✓Rinse thoroughly after cleaning
- ✓Dry immediately with a soft cloth
- ✓Use gentle circular motions
- ✓Work in a well-ventilated area
Never Do:
- ✗Use abrasive scrubbers or steel wool
- ✗Put copper in the dishwasher
- ✗Let acidic cleaners sit for hours
- ✗Air dry (causes water spots)
- ✗Use harsh chemical cleaners
Commercial Copper Cleaning Products
While natural methods work wonderfully, commercial copper cleaners offer convenience, consistency, and powerful formulas designed specifically for copper care. Here are the top-rated products trusted by professionals and enthusiasts alike.
Wright's Copper Cream
A professional-grade copper cleaning cream that has been trusted by homeowners and chefs for over 140 years. This gentle yet powerful formula removes tarnish quickly without scratching.
✓ Advantages:
- •Works on all types of copper including tin-lined
- •Non-toxic and ammonia-free formula
- •Fast-acting - removes tarnish in seconds
- •Leaves a protective coating to slow future tarnishing
- •Affordable and widely available
! Considerations:
- •Requires some elbow grease for heavy tarnish
- •Can be messy - wear gloves recommended
Bar Keeper's Friend
Originally developed for commercial kitchens, this oxalic acid-based cleaner is incredibly effective on copper. Available in powder and liquid forms, it's a favorite among professional chefs and serious home cooks.
✓ Advantages:
- •Extremely effective on heavy oxidation
- •Works quickly with minimal scrubbing
- •Multi-purpose - also cleans stainless steel, porcelain, and more
- •Cost-effective with concentrated formula
- •Available in both powder and liquid versions
! Considerations:
- •Contains oxalic acid - requires careful handling
- •Can be too aggressive for decorative copper
- •Requires thorough rinsing
Weiman Copper Cleaner & Polish
A convenient spray-on formula that both cleans and polishes in one step. Weiman's unique formula includes tarnish inhibitors that help keep copper shiny longer between cleanings.
✓ Advantages:
- •Easy spray-on application
- •Two-in-one cleaner and polish
- •Leaves protective coating to prevent tarnish
- •Pleasant scent compared to other cleaners
- •Great for quick touch-ups
! Considerations:
- •Less effective on heavy oxidation
- •More expensive per ounce than creams
- •Goes through product quickly on large pieces
Cape Cod Metal Polishing Cloths
Pre-treated polishing cloths that clean, polish, and protect copper in one easy step. These convenient disposable cloths are perfect for travel, quick touch-ups, or when you don't want to deal with liquid cleaners.
✓ Advantages:
- •No mess - everything contained in the cloth
- •Perfect for travel or storage
- •Dual-action: one cloth cleans, microfiber buff cloth polishes
- •Safe for all copper types including decorative pieces
- •Long shelf life
! Considerations:
- •More expensive per use than liquid cleaners
- •Not ideal for heavily tarnished large pieces
- •Cloths can dry out if package isn't sealed properly
Choosing the Right Commercial Product
For daily use cookware: Wright's Copper Cream or Bar Keeper's Friend are excellent choices. They're powerful enough for regular cooking residue but gentle on tin linings.
For decorative pieces: Weiman Spray or Cape Cod Cloths provide gentle cleaning without risk of over-polishing or removing desirable patina.
For heavily neglected copper: Start with Bar Keeper's Friend to remove heavy oxidation, then maintain with Wright's Copper Cream.
For convenience: Cape Cod Cloths are perfect for quick touch-ups and maintaining already-clean copper between deep cleanings.
The Patina Debate: Shine vs. Oxidation
One of copper cookware's most fascinating aspects is the ongoing debate between maintaining a brilliant shine versus embracing natural oxidation. Both camps have valid arguments rooted in both aesthetics and performance.
The "New Penny" Look
The brilliant, polished copper look is what most people associate with premium cookware. This aesthetic emphasizes copper's natural beauty and lustrous finish.
Advantages of Polished Copper:
- ✓Aesthetic Appeal: The mirror-like shine is stunning and makes cookware a centerpiece in any kitchen
- ✓Visibility: Easy to spot any damage, wear, or issues with the tin lining
- ✓Hygiene Perception: The bright, clean look suggests excellent maintenance and care
- ✓Traditional Standard: Aligns with classical French culinary tradition where polished copper was the mark of a professional kitchen
Maintenance Level: High - requires regular polishing every 1-2 weeks depending on use and exposure to air. Best for those who enjoy the ritual of caring for their cookware and want it to remain a visual showpiece.
The Patina Preference
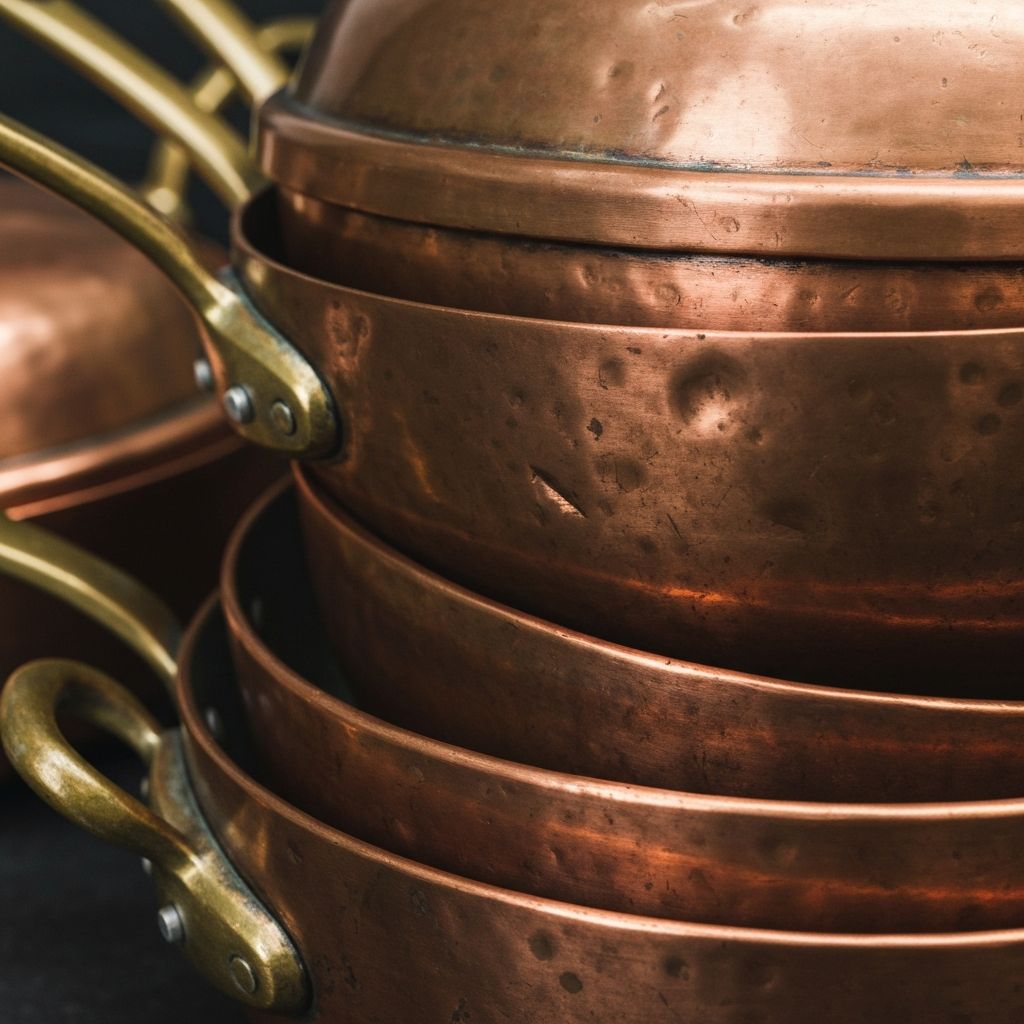
Many professional chefs and cooking purists actually prefer the dark, oxidized patina that develops on copper over time. This isn't neglect—it's intentional and has functional benefits.
Advantages of Copper Patina:
- ✓Enhanced Heat Absorption: Dark patina absorbs radiant heat more efficiently than shiny copper, improving performance slightly
- ✓Reduced Glare: In professional kitchens with bright lighting, patinated copper doesn't create blinding reflections
- ✓Character & History: Each piece develops unique patterns that tell the story of its use—true "wabi-sabi" beauty
- ✓Low Maintenance: No polishing required—simply clean the cooking surface and you're done
- ✓Protective Layer: The oxidized layer actually protects the copper beneath from further corrosion
Maintenance Level: Low - focus on cleaning the interior cooking surface only. Perfect for working chefs and those who prioritize function over appearance. The exterior develops a protective patina naturally.
Heat Performance
Dark patina absorbs radiant heat slightly better than polished copper, though the difference in conductivity is negligible. Both perform excellently.
Time Investment
Polished copper requires 10-15 minutes of maintenance per piece every 1-2 weeks. Patinated copper needs only standard cleaning after each use.
Aesthetic Impact
Shiny copper is elegant and attention-grabbing. Patinated copper has rustic charm and professional authenticity. Both are beautiful in different ways.
Professional Chef Perspectives
"In professional kitchens, we don't polish our copper. The patina improves heat absorption, and honestly, we don't have time for cosmetic maintenance. Our copper is 30 years old, deeply patinated, and performs flawlessly every single day."
— Executive Chef, Michelin-starred French Restaurant
"I keep my home copper collection brilliantly polished. Yes, it's extra work, but these pieces hang in my open kitchen and are conversation starters. The maintenance is part of the joy of ownership for me."
— Culinary Instructor & Cookbook Author
The Bottom Line:
There is no "right" answer. Both polished and patinated copper are perfectly valid choices. Your decision should be based on your aesthetic preferences, available time for maintenance, and how you use your cookware. Some collectors even maintain a hybrid approach—keeping display pieces polished while allowing daily-use pans to develop patina. The most important thing is to clean the cooking surface properly after each use, regardless of how you maintain the exterior.
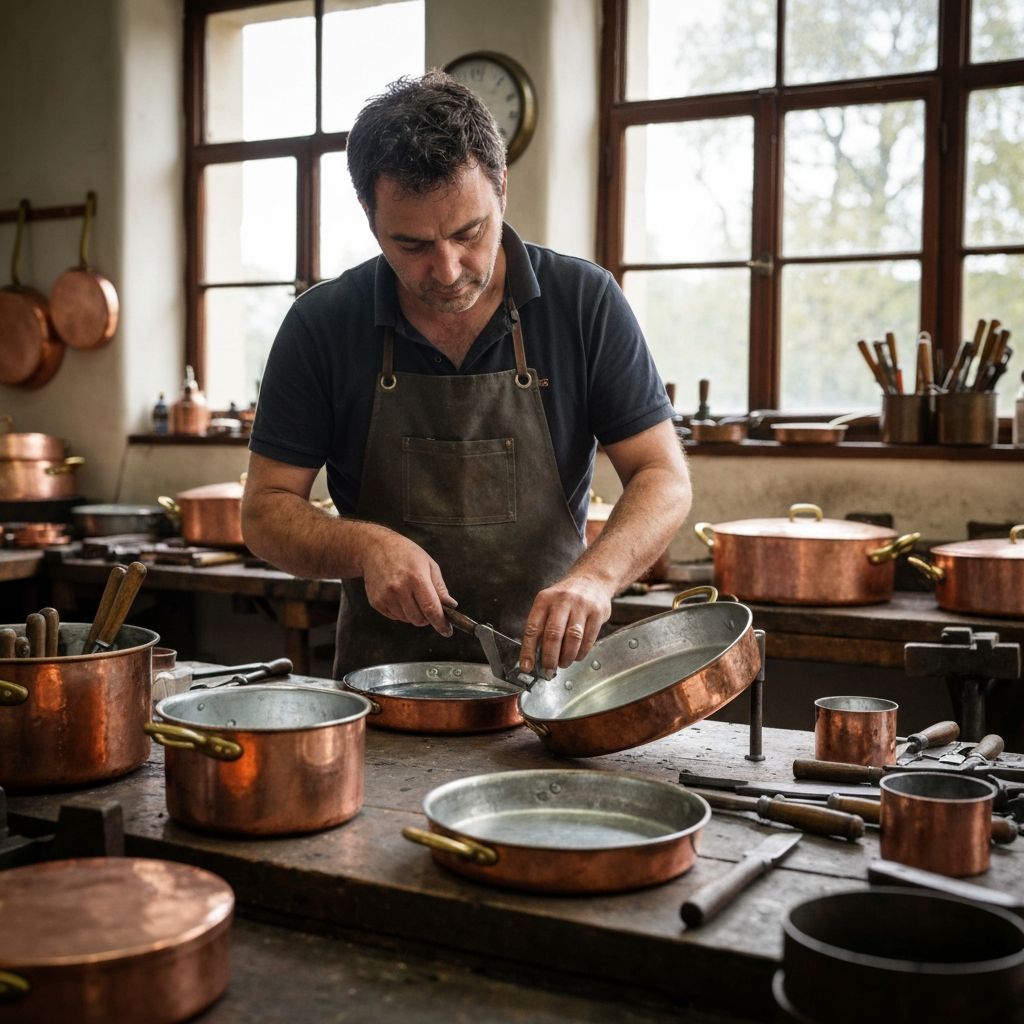
Damage Control & Repair Guide
Even with excellent care, copper cookware may eventually need repairs. Here's how to identify, address, and prevent common issues so your copper pieces last for generations.
Minor Scratches on Exterior Copper
Low PrioritySurface scratches on the exterior copper are purely cosmetic and don't affect performance. They're almost inevitable with regular use.
Light Scratches (Surface Level)
- 1.Clean the area thoroughly with copper cleaner
- 2.Use very fine steel wool (0000 grade) or copper-specific polishing compound
- 3.Rub gently in the direction of the scratch, not across it
- 4.The scratch will blend into the surrounding copper over time
- 5.Finish by polishing the entire piece to create uniform appearance
Note: Most light scratches disappear completely after a few cleaning cycles as the copper oxidizes and polishes naturally.
Deep Scratches or Gouges
- 1.Deep scratches cannot be fully removed without professional refinishing
- 2.You can minimize their appearance by cleaning and polishing the surrounding area
- 3.Consider embracing them as part of your cookware's character and history
- 4.If severe enough to affect structural integrity, consult a professional retinner
Note: Remember: copper is a soft metal. Scratches are signs of authenticity and use, not defects.
Dents in Copper Body
Medium PriorityCopper's softness means it can dent if dropped or struck. Small dents typically don't affect performance, but larger ones may need professional attention.
Small Dents (Less than 1 inch)
- 1.Small dents generally don't affect cooking performance and can be left as-is
- 2.For bottom-surface dents, check that the pan still sits flat on your cooktop
- 3.If the pan wobbles, a professional can often flatten the bottom during retinning
- 4.Side dents are purely cosmetic and part of copper's lived-in character
Note: Many chefs prefer copper with dents and wear marks—it shows the cookware is well-loved and actively used.
Large Dents or Structural Damage
- 1.Large dents may affect heat distribution if they deform the cooking surface significantly
- 2.Attempting DIY repairs on severe dents often makes them worse
- 3.Contact a professional copper smith or retinning service
- 4.Companies like Rocky Mountain Retinning, East Coast Tinning, or Brooklyn Copper Cookware can assess and repair
- 5.The cost is usually $30-75 depending on severity, often done during retinning
Note: Professional copper smiths have specialized tools to work dents from the inside without damaging tin lining.
Worn or Damaged Tin Lining
High PriorityThis is the most critical maintenance issue. Tin lining wears down over time with use and high heat. When copper shows through, retinning is necessary.
Identifying Worn Tin Lining
- 1.Look for pinkish copper color showing through the silvery tin interior
- 2.Tin thickness varies: new lining is 1-2mm, needs retinning when <0.5mm remains
- 3.Check high-wear areas: center of pan bottom, sides where utensils contact most
- 4.If you see copper in more than a few small spots (combined area larger than a quarter), it's time to retin
- 5.Small pin-holes are normal in old tin and not urgent unless numerous
Note: Plan for retinning approximately every 20-40 years with normal home use, or every 5-10 years in professional kitchens.
Retinning Services
- 1.Professional retinning costs $35-75 per piece for standard pans, more for large items
- 2.Recommended services: Rocky Mountain Retinning (CO), East Coast Tinning (PA), Brooklyn Copper Cookware (NY)
- 3.Turnaround time is typically 4-8 weeks
- 4.The service removes old tin, thoroughly cleans the copper, and applies fresh tin lining
- 5.Good retinners use traditional wiped-tin method for authentic results
Note: Do NOT use copper cookware with worn-through tin lining. Exposed copper can react with acidic foods and release copper into food.
Preventing Premature Tin Wear
- 1.Never heat an empty tin-lined pan—tin melts at 450°F
- 2.Use medium or lower heat; copper's conductivity means you rarely need high heat
- 3.Use wooden or silicone utensils to minimize abrasion to tin surface
- 4.Avoid metal whisks or sharp utensils that scratch tin
- 5.Don't use abrasive cleaners or scrubbers on the tin interior
- 6.Never put tin-lined copper in the dishwasher
Note: Proper care can extend tin lining life significantly. Some home cooks get 30+ years from original tin.
Loose or Damaged Handles
Medium PriorityHandles on copper cookware are typically attached with rivets (bronze, brass, or iron). Over decades, these can loosen.
Slightly Loose Handles
- 1.Check if the rivets have worked themselves loose—this is common on vintage pieces
- 2.Small amounts of play are generally safe, but monitor for worsening
- 3.Avoid picking up full pans by handle alone if loose—support the bottom
- 4.If the handle rotates or wobbles significantly, stop using until repaired
Note: Don't attempt to tighten rivets yourself—you'll likely cause more damage to the copper.
Severely Loose or Broken Handles
- 1.This requires professional repair—handle reattachment needs specialized copper working skills
- 2.Contact the same retinning services mentioned above; most also do handle repairs
- 3.Cost is typically $25-50 per handle depending on complexity
- 4.If the original handle is cast iron or brass, the repair shop may need to source matching replacements
- 5.This is a good time to have any other repairs done simultaneously (retinning, dent removal, etc.)
Note: Handle repair is critical for safety. Never use copper cookware with compromised handle attachment.
Trusted Retinning Services
Rocky Mountain Retinning
One of the most respected retinning services in North America. Traditional hand-wiped tin method.
Visit WebsiteEast Coast Tinning
Excellent service based in Pennsylvania. Fast turnaround and reasonable pricing.
Visit WebsiteBrooklyn Copper Cookware
Artisanal retinning and copper restoration. They also sell new handmade copper pieces.
Visit WebsiteWhen to Seek Professional Help
Visible copper through tin lining: This is urgent. Stop using the piece until retinned.
Loose or broken handles: Safety issue—get repaired before using.
Large dents affecting pan stability: Can compromise cooking performance.
Separation at seams or joints: Structural issue needing professional soldering.
Unknown damage on vintage purchases: Have assessed before use.
Professional repair services typically cost $50-150 per piece depending on work needed. This is a worthwhile investment considering copper cookware can last 100+ years with proper care and maintenance.
Essential Care Tips for Long-Lasting Copper
Follow these fundamental principles to keep your copper cookware performing beautifully for decades.
Establish a Cleaning Routine
After each use: wash with warm soapy water, dry immediately. Weekly: polish exterior if you prefer shine. Monthly: deep clean with your preferred method to remove stubborn tarnish.
Control Your Heat
Never preheat empty copper pans—add oil or butter first. Use medium heat for most cooking; copper's superior conductivity means high heat is rarely necessary. This protects tin lining and saves energy.
Use Proper Utensils
Stick to wooden, silicone, or heat-resistant nylon utensils. Avoid metal spoons, whisks, or spatulas that can scratch tin lining. Never cut food directly in the pan.
Store Correctly
Hang copper cookware when possible to show it off and prevent scratching. If stacking, use pan protectors or soft cloth between pieces. Store in a dry place to slow tarnishing.
The Golden Rules of Copper Care
Never use dishwashers - hand wash only with mild soap
Dry immediately - air drying causes water spots
Avoid abrasive scrubbers - use soft sponges or cloths
Monitor tin lining - check regularly for wear and copper showing through
Use appropriate heat - medium or lower for almost all cooking
Clean interiors thoroughly - regardless of exterior patina preference